Every couple of years, I want to make ravioli from scratch. It’s a long and involved recipe, so I have to let a lot of time go by before I do it again! I thought I would document the process for any one who wants to try. I made gluten-free ravioli, but the recipe is very similar for regular ravioli. Leave a lot of time if you want to make this. It took me several hours.
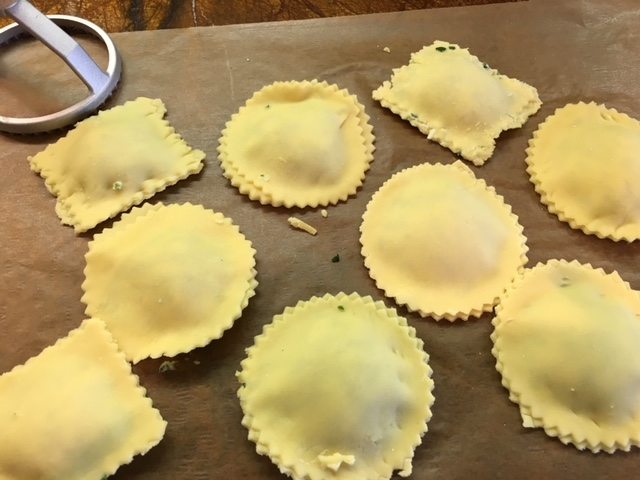
These are some of the bigger raviolis I made, using the press or cutter at top. They are far from perfect!
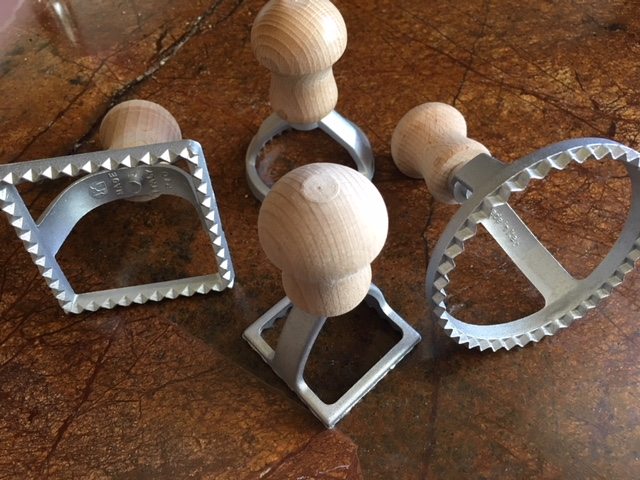
Here are the different size ravioli press/cutters that came in the kit pictured below.
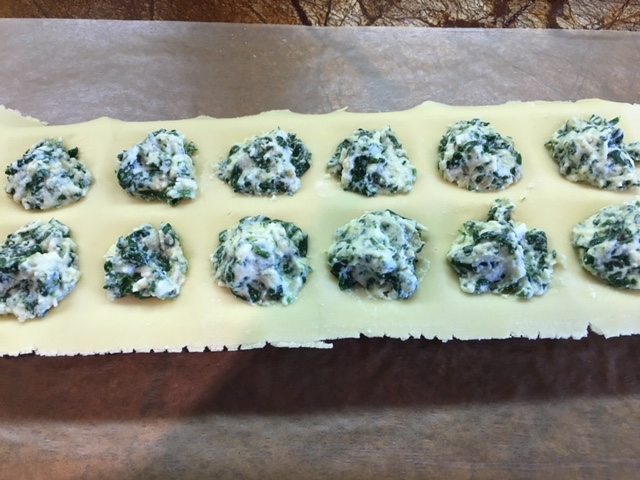
You can see the filling loaded in, ready for the top to go on. I am using a ravioli mold from the kit I bought (below). These ravioli are a bit smaller than the ones I made with the presses.
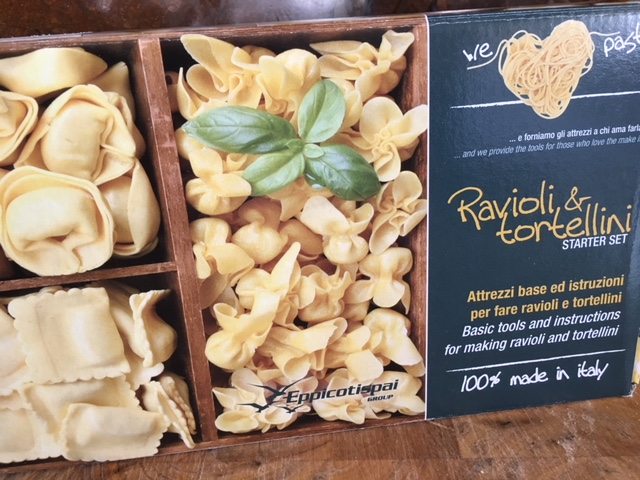
Here is my ravioli kit with the tools you see above. It’s a fabulous help to have this kit when you decide to make raviolis from scratch. It’s made in Italy, of course.
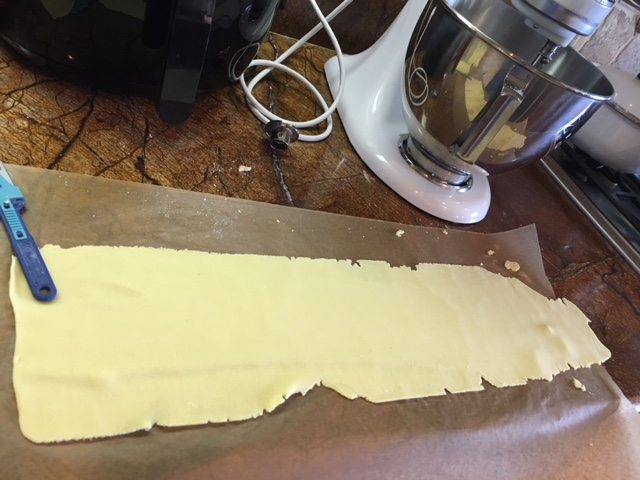
I found that using my Kitchen Aid with the pasta attachment made better ravioli than trying to get the pasta thin enough by just using a rolling pin. After I got the pasta sheets to the right size and consistency using the pasta roller, I put the pasta on a large sheet of waxed paper next to my Kitchen Aid to prepare the raviolis.

This is the roller attachment I use to flatten and prepare the pasta sheets. It does a terrific job.
Makes about three dozen ravioli
Ingredients
FILLING
1 tablespoon olive oil
1 shallot, finely chopped
1-2 garlic cloves, minced
8 ounces fresh baby spinach leaves
salt & pepper
1 cup ricotta cheese
4 tablespoons shredded parmesan cheese
1 large egg, beaten with a fork
Sprinkle of lemon zest
4-6 leaves shredded basil leaves
DOUGH
•2 cups gluten-free all-purpose flour
•3 large eggs room temperature
•2 Tablespoons olive oil
•1 teaspoon salt
•2-4 Tablespoons water
To Finish
Your favorite marinara sauce
Shredded Parmesan cheese
Six or so shredded basil leaves
DIRECTIONS
Clean a large work surface where you will knead the pasta dough. (I use a large plastic baking mat.) Have your rolling pin ready and put on your apron! Place flour in large bowl.
Add salt and whisk to combine.
Use measuring cup to form a well in the flour, creating high sides. Add eggs in well.
With a fork, whisk eggs inside well.
Working from the outside in, carefully fold flour into the center and mix.
Add 1 T of olive oil.
Keep mixing (it will be very messy and dry; just keep going.) Add 1 T of water to help it come together. If too dry, add another 1 T of oil. As it starts to come together, take the dough out onto the kneading surface.
Knead the dough until it fully comes together; this will take a few minutes. (I put some olive oil on my hands). Add a few drops of water as needed. Once you have it in a ball that holds together well, split it into four pieces, like disks.
Cover with plastic wrap until ready to use.
Prepare the Filling
While the pasta is resting, prepare the filling. Heat olive oil in large skillet and add the shallots. Saute for 2-3 minutes. Add the garlic and cook for another minute or so. Toss in the spinach and cook until wilted, stirring constantly. Should only take about 2 minutes. Add salt and pepper. When done, place spinach mixture in colander in sink or in a bowl, so liquid streams out while cooling. After it has cooled, press with a paper towel to squeeze out more liquid until it becomes as dry as you can manage. Chop the cooked spinach and add to bowl. (Be sure to include the cooked garlic and shallot). Add the ricotta, Parmesan cheese, shredded basil, lemon zest and egg. Mix well. Add more salt and pepper as needed. Put filling in fridge while you prepare the pasta sheets.
Make the Ravioli
Use a ravioli roller, hand cranked or an attachment to Kitchen Aid as pictured. I made ravioli before without this appliance, and I could not get the pasta thin enough and the ravioli were too thick and chewy. This roller step makes a real difference in your final ravioli taste and appearance.
As I showed in the photo above, I also bought a ravioli kit that has the molds, cutters and other tools that are essential.
With a rolling pin, roll out one of the four disks of pasta dough left resting. Get it thin enough to feed through the pasta roller. I used the Kitchen Aid attachment pictured above and starting rolling it through on the number 1 setting. Roll it through several times, folding it over each time onto itself until the dough is elastic and strong. Next, go to the #2 setting and roll it through there several times. I found that this setting worked best for ravioli, even though the instructions said to go to a thinner setting. If it’s too thin, the pasta will break or tear as you load in the filling.
Make sure your pasta sheet is large enough to fit the ravioli mold, if using. (I did two of the ravioli molds first before switching to the individual ravioli cutters). Place the pasta sheet on top of the mold and use a teaspoon to place the filling in each hole. Top with another pasta sheet and seal with the tool in the ravioli kit.
While you finish making all of the raviolis, place your finished raviolis on wax paper and cover with another sheet of wax paper. After making the raviolis with the mold, I then switched to using the separate ravioli stampers. After preparing the sheets, I stamped out each side of the ravioli and then filled the bottom with ricotta spinach mixture, and placed the top on, sealing the sides with my fingers. You can also coat the bottom edges of the ravioli with egg white to help seal it.
While you are finishing filling the raviolis, get a large pot of salted water boiling. Cook the ravioli for five to seven minutes, watching closely, as they will float to the top when they are done.
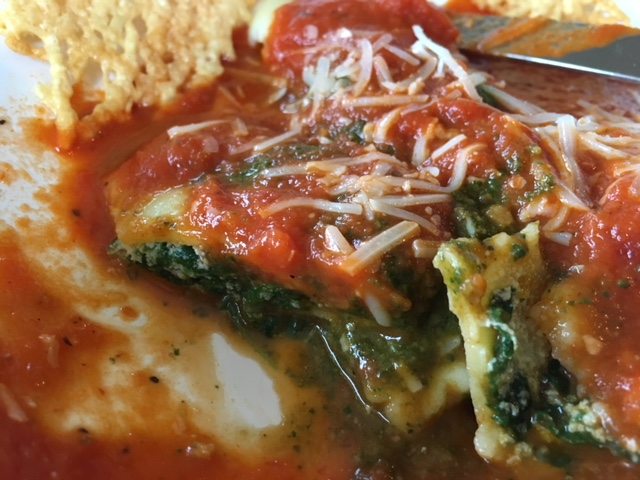
Serve with your favorite sauce and top with additional shredded parmesan and shredded basil. After all that work, they turned out great, kind of melt in your mouth with the freshly-made dough and fillings. I froze the rest of the ravioli we didn’t have for dinner and will have them for dinner soon!
Leave A Comment